When you first dreamt of being an attorney, you probably saw yourself commanding a courtroom or sitting at a table late at night, pouring over legal documents—not running spell check through Microsoft Word for the twelfth time. But, like it or not, utilizing this tool is a key part of lawyering, and knowing the ins and outs of it will make your job much easier.
From mastering shortcuts that save you buckets of time to preventing clients from tampering with your words via Track Changes, read on to discover the top Microsoft Word for lawyer tips.
- Master Basic Shortcuts
- Create Custom Shortcuts
- Make the Most of Templates
- Apply Pre-Formatting With Styles
- Customize Auto-Recover
- Save Time With Quick Parts
- Restrict Unwanted Editing
- Remove Sensitive Metadata
- Password Protect Your Documents
#1 Master Basic Shortcuts
Before diving into any fancy tricks, let’s start with the basics: shortcuts.
When mastered, keyboard shortcuts can make writing and editing long pages of documents more efficient. Outside of cut, copy and paste, here are a few common ones you should memorize:
- Double-click your mouse to select one word. Triple-click to select a paragraph.
- Use the “Find and replace” feature to change all instances of a term in a long document.
- Ctrl + Shift + V (Command + Shift + V for Mac) will paste unformatted text.
- Ctrl + K (Command + K on Mac) will hyperlink a selected word or phrase.
- Alt+20 (Option + 6 on Mac) = ¶
- Alt+21 (Option + 7 on Mac) = §
#2 Create Custom Shortcuts
Once you’ve got the basic shortcuts down, you can play around with creating your own using the Macros feature. If you find yourself frequently typing the same phrases or symbols, save yourself the headache and create a shortcut for it.
Here’s how:
- In the Ribbons Tab, click View.
- Select the Macros option in the far-right corner.
- Select Record Macros and follow the prompts.
#3 Make The Most Of Templates
Starting from a blank page for every legal document can be daunting. However, utilizing the standard Microsoft templates (and creating your own) can streamline your writing process.
While there are templates for letters, emails, and other common uses, you can create your own for everything from arguments to subpoenas. Just format what you want your template to look like on a standard blank page and then save it as a Word Template under the “Save as type” option.
However, it’s worth your time to browse Microsoft’s online library of templates as they have quite a few options for legal documents.
#4 Apply Pre-Formatting With Styles
As with any professional and legal-binding document, you want the final formatting to be consistent throughout. However, manually reforming and adjusting every single heading, paragraph, and bullet point can eat up a lot of non-billable hours. That’s why many lawyers turn to the Styles feature to save time and still achieve a professional, cohesive look for their documents.
Using the Styles tool allows you to apply your desired formatting to the entire document quickly. All you have to do is predetermine what you want certain types of text to look like, and then, with one click of your mouse, your document is ready.
#5 Customize Auto-Recover
We don’t need to remind you how unprofessional, risky, and downright devastating it is to lose a document because you accidentally forgot to save it. So save yourself the embarrassment (and potential repercussions of losing important information) and make sure your AutoRecover feature is set up correctly.
In your preferences, you can set up AutoRecover to automatically save your work as often as every five minutes and create a backup copy of every document you create. This might be excessive in some professions, but as an attorney working with often sensitive information, you can never be too careful.
#6 Save Time With Quick Parts
As a lawyer, you know how often common pieces of text and legalese come up over and over again when writing documents. While the copy and paste shortcuts can help, Quick Parts makes it even easier to reuse content. Also referred to as building blocks, these reusable pieces can include images and graphics, making it a great option for addresses or headers with your practice’s logo.
Here’s how to create a Quick Part:
- Press the Insert tab.
- Select the Text option.
- Select Quick Parts.
- Follow the prompts to create your own.
#7 Restrict Unwanted Editing
Track changes are a great way to manage edits and additions when you have multiple people working on a document—but all of those revisions can quickly become chaotic. If you’re trying to preserve a version of a document or prevent someone from making unwanted changes, there are two Microsoft Word features you can use: Restrict Editing and Mark as Final.
Restrict Editing allows you to essentially turn off the Track Changes option for certain parts of your document, like direct quotes or other important information that shouldn’t be altered. Mark as Final allows you to turn a document into read-only, which disables both editing commands and typing.
#8 Remove Sensitive Metadata
As a lawyer, one of your primary responsibilities is confidentiality. So it’s beyond crucial to make sure that any sensitive metadata is removed before a document is shared. Microsoft Word’s Document Inspector will scan your document and alert you to any hidden data or other personal information, such as the original document author.
After scanning, Document Inspector will remove the metadata it finds before it’s shared or made public, thus protecting you and your client.
#9 Password Protect Your Documents
Another way you can further maintain your attorney-client privilege is by password-protecting all of your documents. Setting this up will keep information between the intended parties so that it doesn’t fall into the wrong hands.
Here’s how to password protect your documents:
- First, go to the File tab.
- Select Info.
- Then select Protect Document
- Select the Encrypt with Password option.
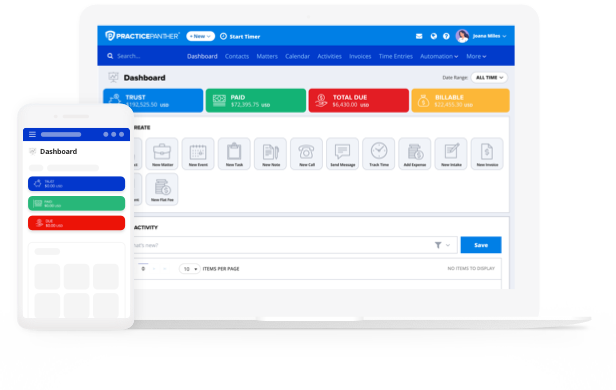
However, it’s important to note that Microsoft Word will not store your passwords. So if you lose it or forget it, there’s no other way to access the document. Make sure you store all of your passwords in a secure place and have anyone else who has access do the same. Another great way to manage and store your sensitive legal documents is by utilizing a practice management software. Platforms like PracticePanther store documents in the cloud and offer top security for your assets. If you’re interested in learning more about PracticePanther, you can sign up for a custom demo today.


